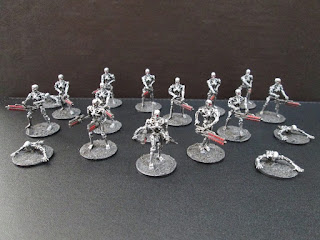
As I received my shipping notice for the Terminator Miniatures Game on Friday I thought I'd best get a move on and get some terrain sorted and ready for action. The game comes with 2D terrain and some 3D barricades (designed by Battle Systems) which although great for quick out of the box games or people new to the hobby I like to have full table of fitting terrain whenever possible. Now quickly going back to Battle Systems for a moment, when it comes to fighting inside of Skynet facilities you can bet I'll be getting some use out of their Sci-Fi kit (as seen in my Doctor Who games earlier in the blog) which is absolutely perfect for this however for the post Judgement Day outside world I'd need something new. I do have quite a bit of the 40k ruined buildings which I tried to paint subtly and though they will work well with something like the Batman Miniatures Game due to all the Gothic styling it just wouldn't look right for something that is supposed to be in the near future like Terminator.
Luckily I happened to back the Mars Attacks Kickstarter which included some of the new 20th Century intact and ruined Battlezone kits. I ripped open the bags to have a better look at them as they had been at the bottom of a box since they had arrived and they were just what I was after. Now these kits come in a red plastic so that you can play with them 'straight out of the box' and all the examples I had seen up until this point had been painted as red brick as well but this didn't match up to the images we had seen of a post Judgement Day world. So I decided to try and paint them up to match what we had seen in the films; grey, bleak and if I could manage it painted to look like it was night (important as the buildings come with intact windows).
First up I had to put the kits together and in a way that would not only reflect the look I was after but also one that would game well. I decided early on that having any intact buildings wouldn't look right so I ended up mixing the intact and ruined kits together, which I think worked out quite well as it is still very easy to see where the areas of dense terrain are and which pieces just act as barricades.
The next step was an easy one, the black undercoat. Luckily the weather held out for me on the day so I was able to get them sprayed up without an issue. As usual it was the good old pound shop car spray that I used.
Next up I gave everything a heavy over-brush of a 50/50 mix of Cold Grey and Black. Already the terrain was looking how I'd hoped.
Once the last layer had dried I started to add dry brush layers of pure Cold Grey first and then an uneven layer of Fortress Grey to add some texture.
Now that the buildings were nearly finished it was time to weather them up a little to give them a truly ruined feel. First I had to paint the doors, I selected a gun metal colour which I then sponged with Warplock Bronze to give them a rusted look. Then I drybrushed Flat Brown around the bottom quarter of the buildings which was then followed by a drybrush of Earth which covered the bottom third of them. I then sponged black onto the buildings at various points to look like blast marks. To finish this stage off a wash of 50/50 Strong Tone and water was applied over everything except the windows (which up until now had been included in all the paint stages).

It was at this stage that I gave the buildings a spray of Liquitex matt varnish which not only adds a layer of protection but also takes away any streaks that the wash might have caused in the previous stage. Once the varnish had dried (again thank you weather) it was time to tackle the windows. Initially I had thought that I would be base coating the windows again and then painting some effect to make it look dark/night however I actually liked how the windows looked as they were and after a suggestion from one of the TMG Facebook group I simply painted over them with Tamiya's Clear Smoke. This darkened the windows off while giving them a reflective quality which worked wonderfully to give the impression of night time and hopefully you can see a little of this in the photo below. For the photo of this last stage I also gathered up all the other pieces of scenery which I plan on using for the game to get an idea of how everything would look together and though I'm very happy with it all I would like to expand on this with things like rusted/ruined cars and the like.

And with that I had managed to do something I had not done before, start on a hobby project and complete it in one day! It shows what a good incentive can do for you.
Phil


