Thursday, 9 October 2014

Progress report on the Deadzone building project

Just a quickie today, which is more images than words this time, on my progress with the Deadzone terrain.

Anyway, enough with the words and on to the pictures:

A quick trip to Halfords (well not so quick as we ended up at the pub, as you do) and I was prepped for spraying

This was the first time I had used Halfords sprays but you can colour me (ha-ha) impressed, great coverage and the choice of colours was eye opening

Now to the next phase of building, the Star Port.  As usual I sketched out what I wanted first and once I had checked I had enough parts I got cracking.

The Defence Tower, the quad gun on top was something I borrowed from Tyler Schulz on Facebook so kudos to him for that

This is how the Tower breaks down into sub buildings

Here's the landing platform with comms tower

Again the breakdown of buildings

 Finally what you can do when they combine

Next I'll be moving on to the ruined sprue and hopefully I'll bring you pictures of that with some completed paint jobs on the other buildings.

Phil

Monday, 29 September 2014

Doctor Who and the Valiant Endeavour

For part two of today's postings I'll cover Saturday's game of DWMG ( a great rule set to play with).

Cybermen have disabled and boarded the Valiant Endeavour, taking control of key locations throughout the ship in swift succession.  The Doctor and Liz must get back to the TARDIS with as many of the remaining survivors as they can and if possible collect data on why the Cybermen have taken control of the ship.  A nice simple objective for this game, get the Doctor out of there with as many other survivors as possible, the Doctor's side were set up in engineering with the TARDIS located in the command section with the Cyber force dispersed throughout the ship.  For the Doctor's side to win he and Liz had to get back to the TARIDS with extra victory points being scored for each survivor who makes it with them and bonus points for picking up the intel (located in the crew quarters).  The Cybermen's job was simple, stop the Doctor at all costs with points scored for each survivor picked off.
This was a great game with quite a bit of narrative going on throughout along with making up rules for some interesting situations as we went along.  I had a blast (quite literally unfortunately) playing the Doctor however is was for nought as he was caught in a Cyber crossfire which ended the game with the Cybermen being utterly victorious.

Highlights of the game:


The Doctor's starting position in engineering

The Cyber forces were spread throughout the ship taking key positions

The game started with the ship in lock down so all doors were sealed, the Doctor could have chose to try and tinker with a doors wiring to open it (intelligence test) but this would have alerted the  Cyber Forces of their whereabouts. 

The Doctor's side split up and travelled through the maintenance corridors to infiltrate into the main part of the ship.  On route a scuttling was heard behind some crates ahead, Sgt. Kean and Trooper Beritz ran forward prepared for action and fiound a Cybermat.  No problem you'd think but it took both of them to take this little Cyber bug out!

Meanwhile the Doctor, Liz and Trooper Caine take the alternate path and come across a patrolling Cyber Scout.  The Doctor tries to stun it with his sonic screwdriver but even with the luck of a Time Lord he wasn't successful, wrong setting perhaps?

Finally the Doctor is successful at stunning the Cyber Scout allowing Liz and Caine to make it to the power generator.  Liz tries to turn the power off and so end the lock down however isn't successful.  It would take the Doctor's alien intelligence to take the generator down in the next turn and so all doors were opened allowing the remaining troopers to advance foward.

As Kean and Beritz advanced along the maintenance corridor Kean spotted a Cyber Scout holding a section of engineering.  Taking careful aim (and being a tad bit reckless with all that plasma about) Kean opened fire with his Laser Blaster and easily finished off the Cyberman.

We continue to follow Kean and Beritz as they reach the main junction into engineering, the Cyber forces are now aware of the Doctor's activity and begin to hunt him down.  Kean yet again spots more Cyber enemies (a sharp one this Kean), this time a group of Cyber Slaves and their Cyberman controller, however they too have been spotted and the Cyber forces being to advance on them.  At this point Kean tries a risky tactic, the Cyber Slaves are currently passing an energy port and if he could take that out he may well take all of them out at the same time.  However Kean knew he would also be caught in the blast but had faith in his armour and the limited cover so fired.  Unfortunately the shot missed and no amount of luck was going to help him... (love the cards for DWMG even when they are played against me).

Kean tries again for the energy port and hits home.  We made up a variable strength for the blast of D6+D3 and 4 inch blast, unfortunately as the Doctor had taken out the power generator it seems there wasn't much power running through the port and only a strength 3 hit was caused which managed to take out just one Cyber Slave.

Kean paid for this as one of the Cyber Slaves got behind him and with a swift blow he was no more.

The Doctor and troops advance on the main engineering junction currently held by the Cyber Slaves.

The Cyber Slaves are no match for the Doctor's force however one manages to grapple with the Doctor and slows him down.  In the end though the Doctor manages to slip from it's grip while a trooper finishes it off.  They then advance into the cargo hold but are caught in a crossfire, damn those cunning Cybermen.

Unfortunately even as Liz collects the vital data from the crew quarters the Doctor is hit!  With his luck spent that was the end of the game and the Cyber Forces, though beaten down, were victorious... I guess its regeneration time. 

I hope you enjoyed the read through as much as we enjoyed playing.

Phil


Building the 'Valiant Endeavour' (A Prelude to Doctor Who)

This is part one of a two part posting all thanks to a great weekend of wargaming.  The plan was to use two newly (well ish) completed goodies, namely the two sets of Battle Systems terrain and the Doctor and an assistant which I've not had the chance to use him since they were painted.
In this post I'll cover the building of the Valiant Endeavour, the setting for the game on Saturday, which took us a couple of hours on Friday evening to build the main structure followed by the final touches on Saturday morning before getting down to business.

I had the idea in my head that I wanted to build a space ship this time round instead of a space base/facility and wanted to see how well the Battle Systems terrain could cope with this.  Unlike the last build that was done on the fly I had a rough idea of the various areas that needed to be included and their location so with this in mind I laid out the floor and started to map out the external walls.  It was at this time I heard a knock at the door which could only mean the arrival of our wargaming comrade Andy and so another body to throw at the build.

Hmmm... what to put down next

Once the external walls where all in place the internal walls needed placing to create the rooms we required, we we going at some pace at this stage as all three of us were working on various parts of the build.

Internal walls in place

One thing that I wanted to achieve was as a Star Destroyer-esque bridge/command centre (from Empire where the bounty hunters are all lined up), in the end I think we ended up with something that definitely had the same feel if not the identical layout.
The final thing to do on Friday was to build up any additional levels that were required before we started dressing the rooms on Saturday morning.  However it didn't feel right having a ship without a name and so she was christened the Valiant Endeavour.

Upper levels going in

Come Saturday morning Andy felt inspired and so started to construct external walkways on the engineering section while Amy and myself filled the rooms with all the great items you get with the Battle Systems terrain.
It is at this point I can present to you, the Valiant Endeavour:

Stern to Bow

Bow to Stern

Engineering

Medical, Crew, Cargo and Command

The Valiant Endeavour

For part two of the post we'll see the Doctor in action against the Cybermen aboard the ship.

Phil

Wednesday, 24 September 2014

Building a Deadzone and the second shipment

The first delivery of Deadzone came some time ago now but it was only recently that I started to break into the rather large box we received and get cracking with putting it together.  I considered what faction I should start with first but in the end decided to go for the games namesake and build up a Deadzone board.  As much as the boards seen on the Mantic site and Kickstarter looked fine I wanted to build structures that looked like they were usable buildings and with this in mind I got the graph paper out and started planning.  I wanted a board that reflected a bustling, multi-levelled space (much like a Mega City or Hive World) and was very much influenced by my early memories of seeing Necromunda for the first time.
Here is my progress so far:


The main structures which the board is based around are the military bunker in the corner (which has a fully playable interior), the central administration building and the large watch tower.  I had outlined where I wanted the other buildings and how they would connect but not their actual shape or height so I just let my imagination go where it wanted while staring with the mountain of sprues in front of me.
When it came to putting the buildings together I knew I would be gluing them together, not only for stability but also a speedier set up time.  However not wanting to reduce the flexibility that the Battlezone kits offer I decided to build in a modular fashion where one building might be made up of three seperate blocks and all the walkways are detachable so that the board could be assembled multiple ways.


At this stage I ran out of the corner connectors (something I knew would happen with how I was constructed this) so this was put on hold until the second shipment showed up, which leads us nicely on to...

The Second Shipment

Monday dinner time and the UPS driver dropped off what can only be described as a box of joy (to me at least).  The box was in good condition and didn't look like it had been used as a football by the deliver folks at UPS so I was hopeful that the contents would all be in good order and I wasn't disappointed.


There was some criticism about the packing of the first shipment and, while not perfect, shipment two was much improved with models and sets being bagged seperately and in some cases labelled.
After checking through the survey list and the contents of the box contents everything seems to be present and correct, barring the resin crates and counters - missing item formed completed and sent, and there wasn't a miss-cast in site (though the hair on the female Pathfinder looks awfully fragile and I think either a different material should have been used, she's cast in a clear blue resin, or the hair should have been sculpted differently).
I know there are quite a lot of images out there now of these miniatures so I thought I'd just put up some of my highlights:

The resin Plague Gen 1 - fantastic details and love the doomed Corp soldier in it's hand

 The resin alt Rebel Commander - again lovely detailing

Bjarg Starnafall - the Forge Fathers are my favourite force in the Warpath universe and I think I'll have this fella heading up many an army

The real highlight of the shipment for me was the hardback rule book, I love a good book and this will take pride of place on the wargaming shelf (well as soon as we buy that new bookcase that is).


The second shipment haul

With the second shipment now in hand I have begun the finishing stages of the Deadzone board (which I'll post pictures off once constructed) but this isn't the end as I have yet more Battlezones to go through, not only for use in Deadzone but also Warpath and beyond.  Currently I'm planning to build a landing pad pretty much as the standard layout and then a secondary smaller pad built on a tower structure which is based on an image I saw of one of Mantic's set-ups, then it's on to a few more standard buildings, perhaps a small bunker and finally on to the new ruined sprues (I'm going to have fun with those I think).

Phil


Friday, 12 September 2014

Build me a Stronghold worthy of Sci-fi

Today will be a quick look at my current hobby project, the recently delivered Battle Systems terrain.  This is card terrain however calling it simply card terrain does it an injustice in my eyes, this stuff is incredibly sturdy and with a little extra work and effort can be made to last for a long time.

The aesthetic Battle Systems have gone for is a generic sci-fi base interior which will work with numerous gaming systems and miniature ranges, personally I have already used one stronghold for a game of Star Wars with further games of Doctor Who, AvP, Warpath (skirmish) and Secrets of the Third Reich in mind.

The first Stronghold set up for a game of Star Wars Miniatures

This is set up is made from a single Stronghold set and doesn't include any of the stretch goal or additional items that came through the Kickstarter

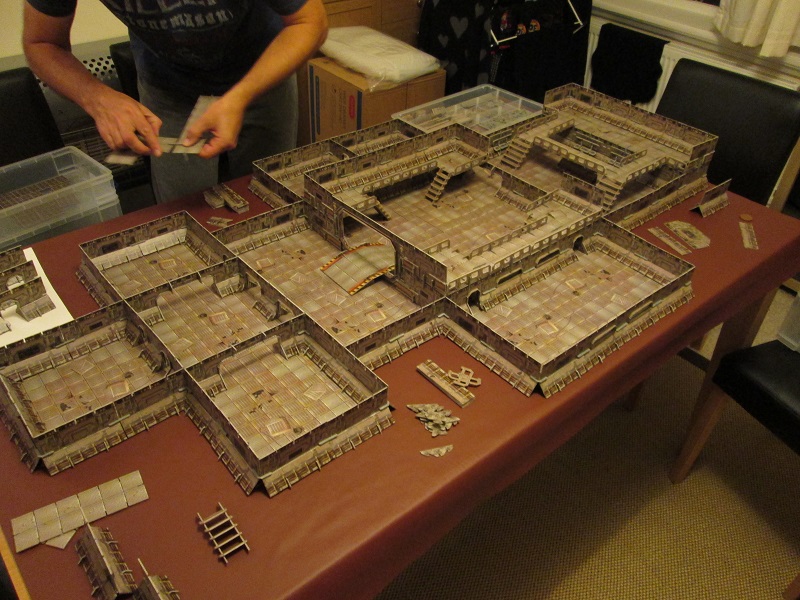
Even with this set up I still had plenty of walls and platforms left so could have built up the upper level much more but being the first build I wanted to keep it simple

The time is takes to build a set up might be a little longer than you are used to but I feel that this is actually half the fun, much like building Lego was (or is).  This was built with no forward planning at all, I just laid out the parts on the table and started to put it together in which ever way looked best at the time.  I did have to change some pieces around when I started to build up a level and looking back now I can see things I would have done differently but that will give me something new to try out next time.
Going back to how to make the terrain more sturdy (and so last longer), it's all in the preparation.  This involves trimming certain slots that, due to the cutting process when being manufactured, are slimmer than others.  Now you can just force the pieces together which will widen the slots as well however it can split the card which will reduce the longevity your set, this isn't really worth it though as the time taken widening the slots is much like cleaning the flash of your miniatures or plastic terrain and takes around the same amount of time.  The next handy hint is to brush a little glue onto the thinner cut pieces which are more susceptible to splitting (I also glued certain pieces of room furniture together for much the same reason, even though they are designed to be reversible, as I have more than enough to make up versions of both).  This makes those pieces very durable and, to borrow from Colin of Battle Systems, almost like plastic.

All my pieces drying after receiving a brush of glue on the edges.  I also glued the door frames in as these will never need to be removed and it just helps make the piece more sturdy

The other great thing with the Battle System terrain is storage, normally (and speaking from experience) once you've built up your nice bit of terrain you then have to find somewhere to store it when not gaming which is not always easy depending on how large the terrain peice is.  Luckily the chaps at Battle Systems put a great video detailing how to store your sets once they were built including where to buy the various boxes, this obviously means a little more expenditure but has been well worth it for me due to the limited amount of space for storage.

This is enough storage for two Stronghold sets plus all stretch goals and add-ons from the Kickstarter.  Nice and tidy as well as  great for transporting to your club or friends house

I've not got much left to work on now, just the stretch goals and add-ons, and I'm hoping to get a full two Stronghold set up going for a game of Doctor Who in a couple of weeks (I'll make sure to get some snaps of this).

What I've got left to work on

Everything I've gone through

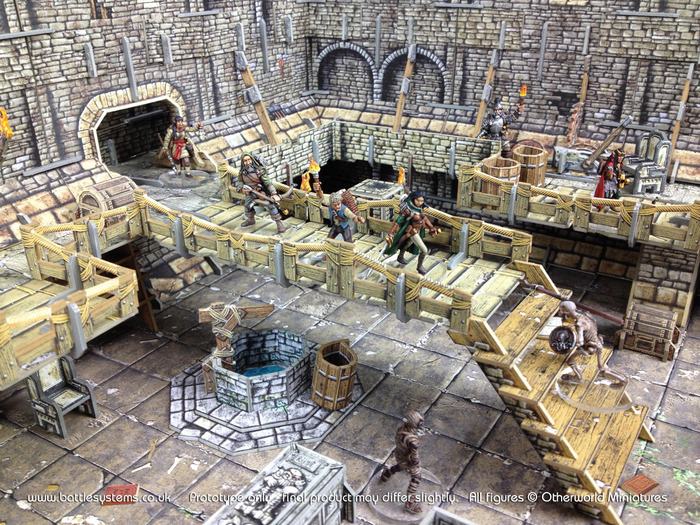
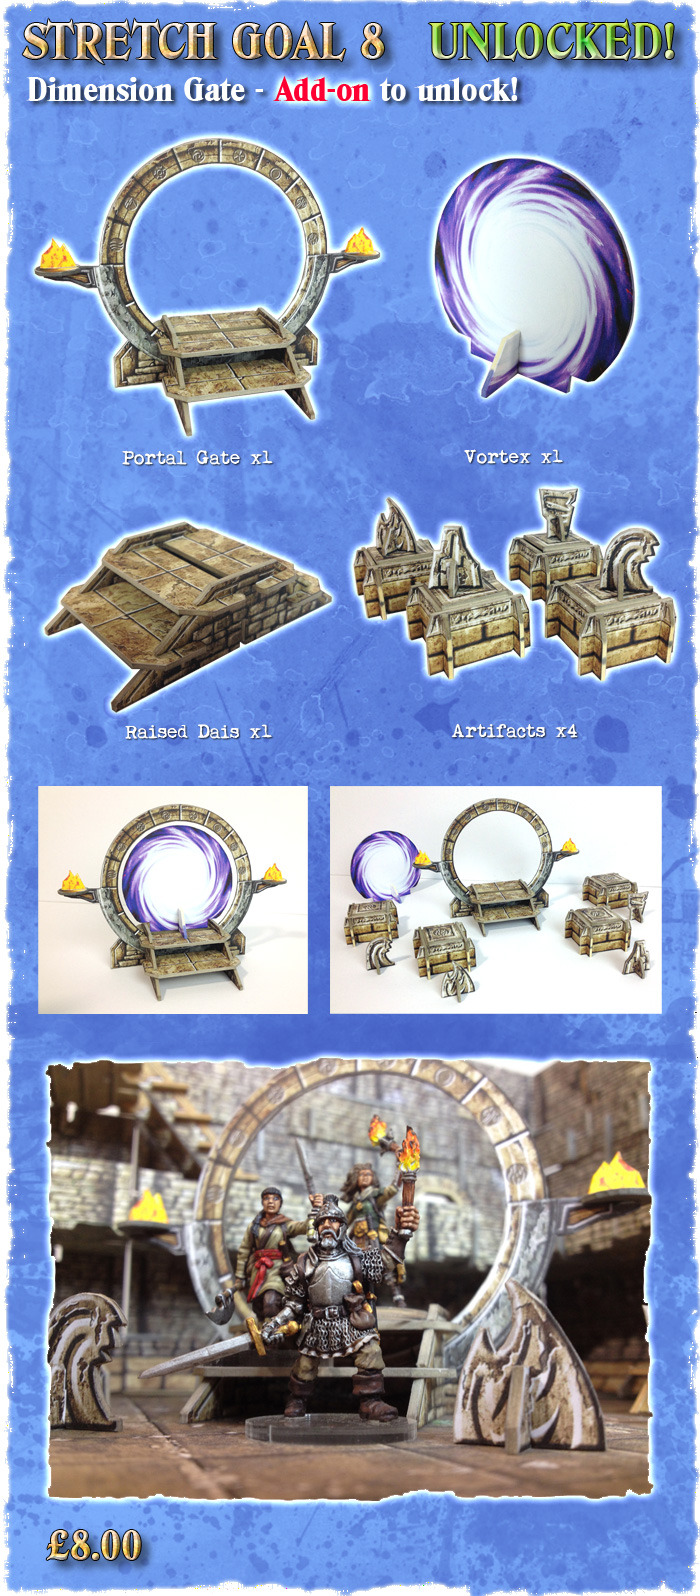
Overall I couldn't be happier with the product I've got, from flexibility of use to the longevity of the set itself and I would happily get some more sets in the future which leads us on nicely to Battle Systems current Kickstarter campaign for the fantasy version dubbed 'The Dungeon'.  Again a great amount of use for this set and again I'll be going for two set which will create a 4x4 gaming area and with the inclusion of one of the add-ons (dimensional gate) I think some games of Stargate will be in order!


That's all for now, in my next post I'm hoping to do an un-boxing of the second shipment from the Deadzone Kickstarter which is due any time now but until then a bid thee merry gaming.

Crucium (aka Phil)